See It In Motion
Watch the Light Come to Life
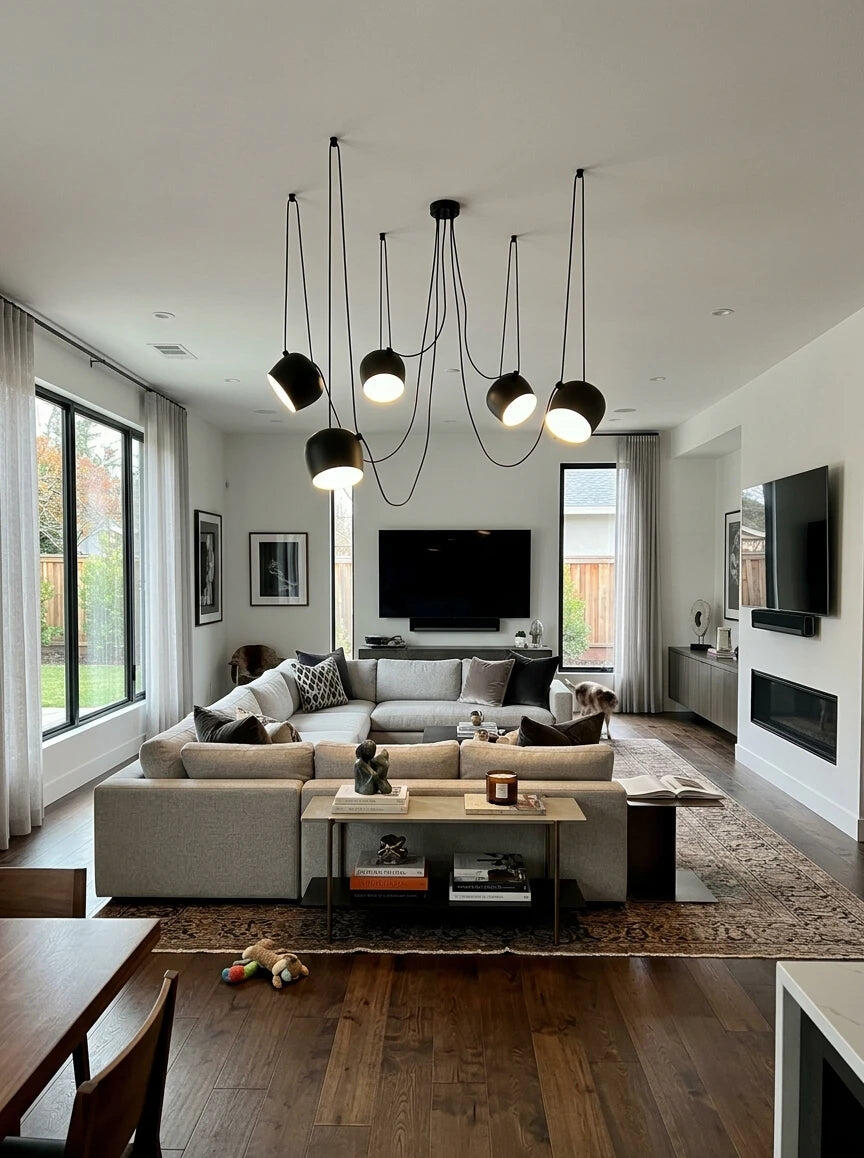
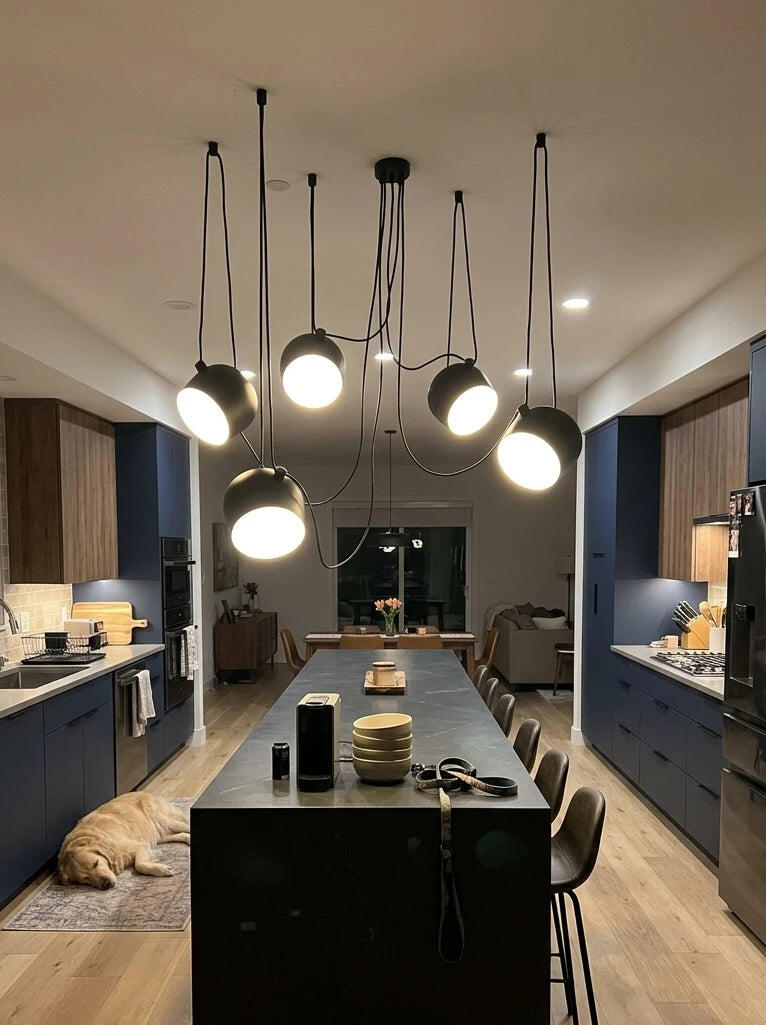
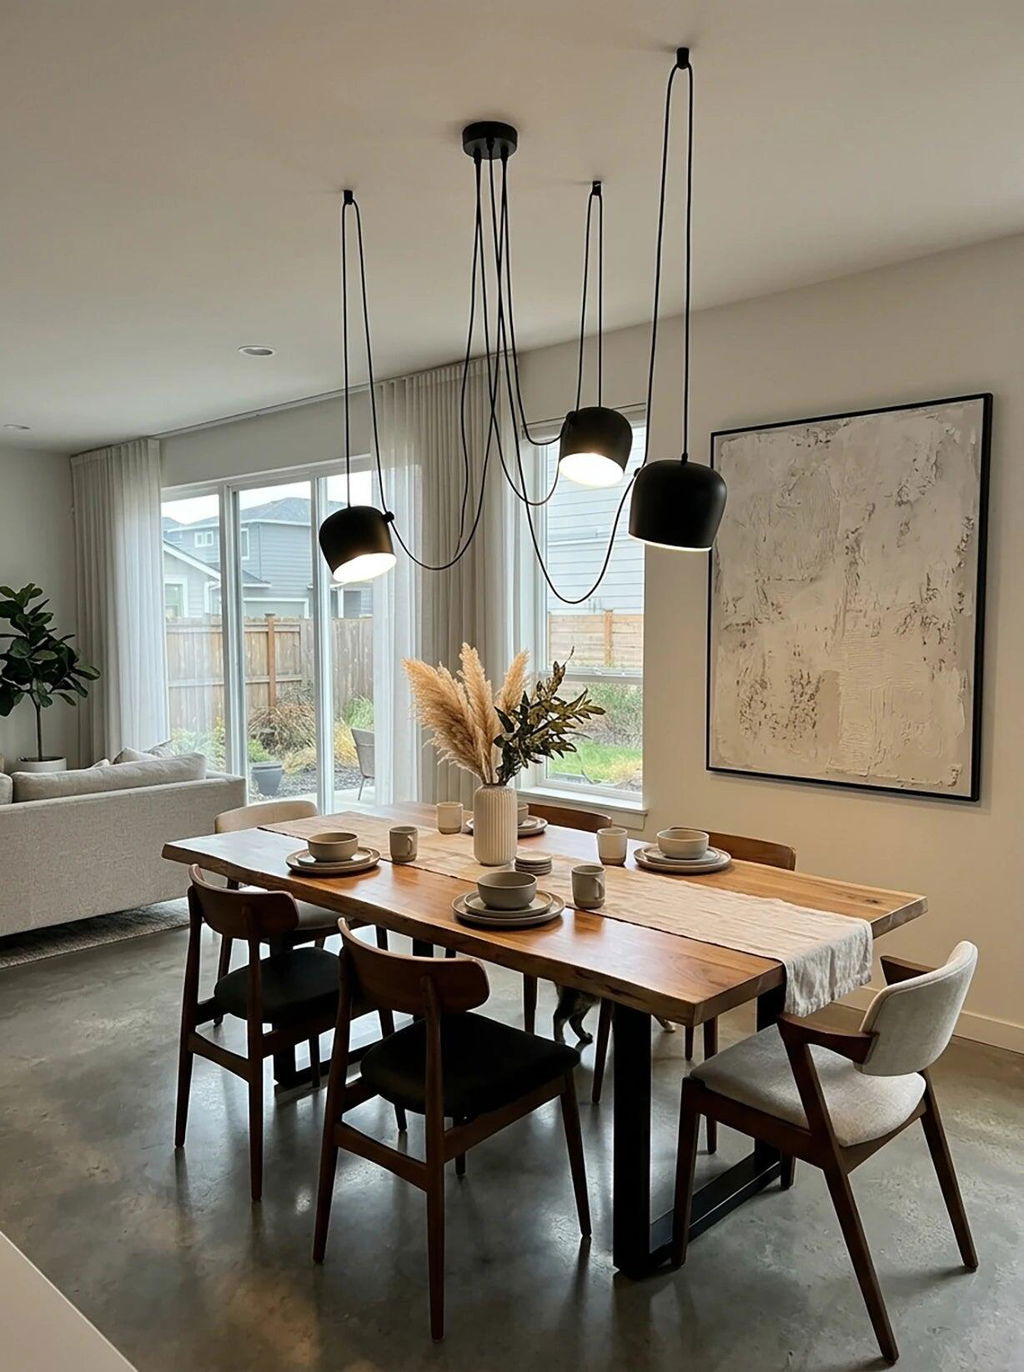
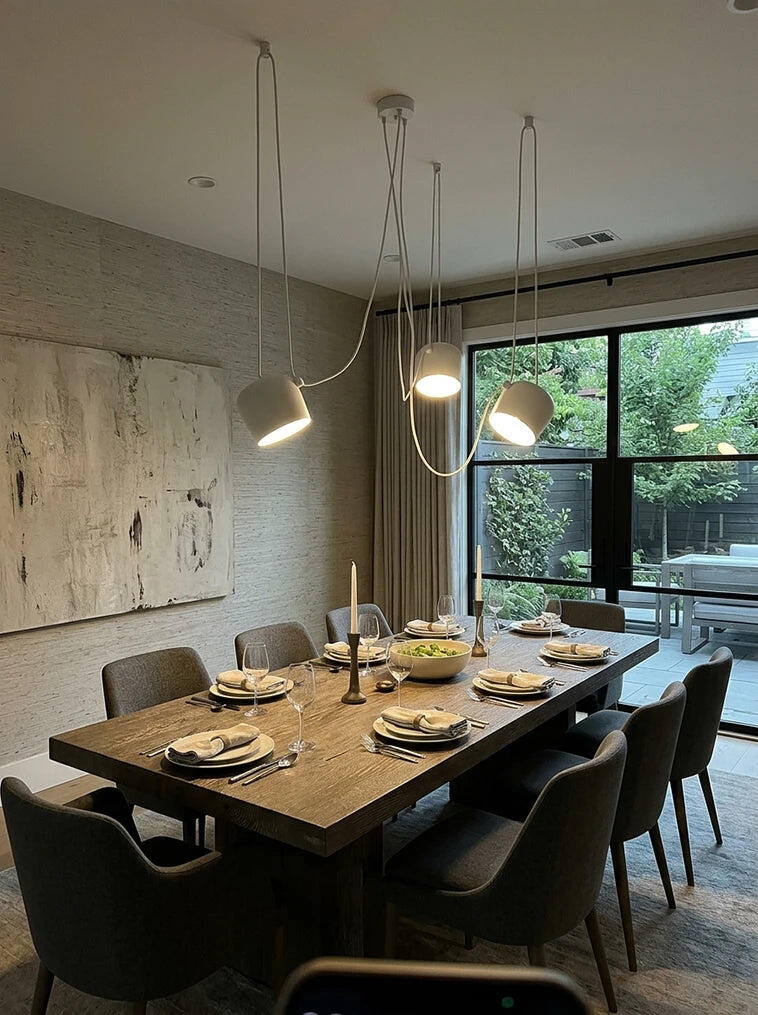
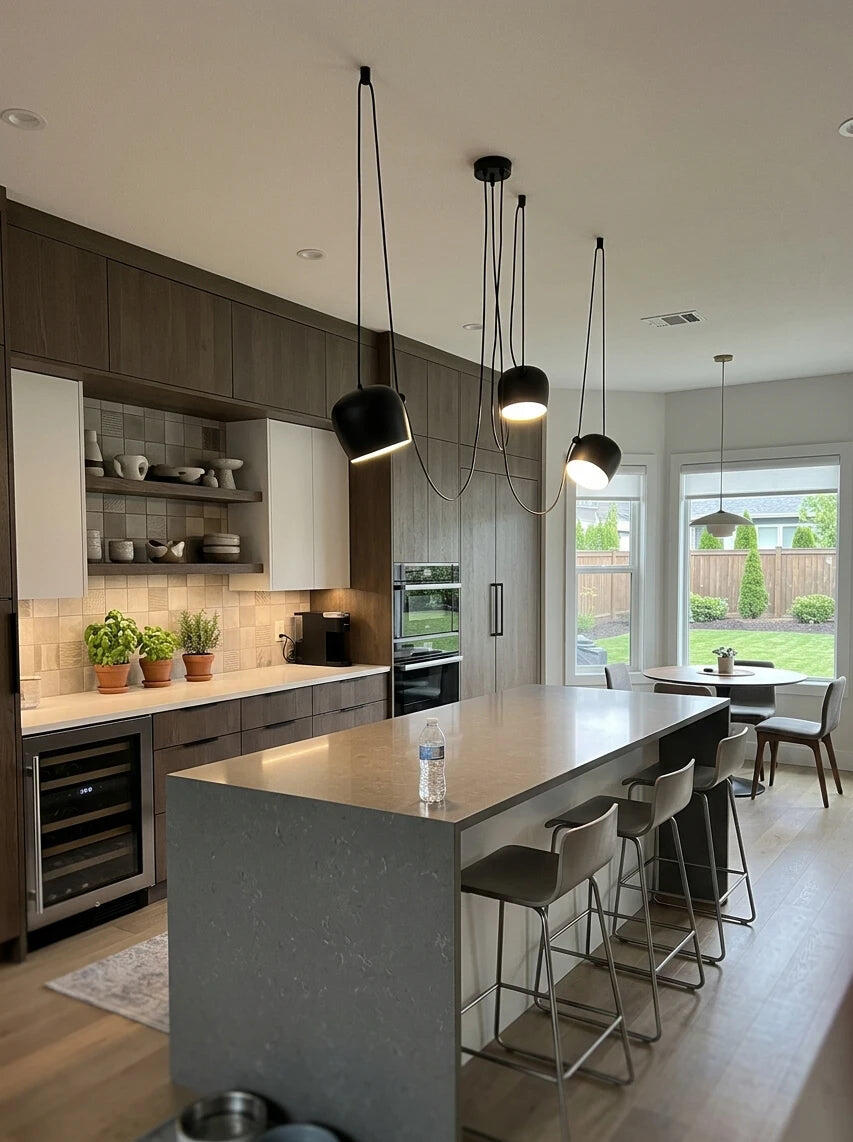
The Onda Adjustable Cable Cluster Pendant runs domed shades on long cables from a single canopy — and leaves almost every decision to you. Hook the cables where you want them, let the slack fall as long or as short as suits the room, and tilt each head individually to point light exactly where it is needed.
Most pendants arrive with their geometry settled. This one arrives as parts. The canopy takes the wiring and sits on your junction box; every cable after that is routed by hand, caught on small ceiling hooks you place yourself. Cluster them tightly over an island, spread them across a room, or let one drop long over a chair while the others stay high.
Each shade pivots at its cable joint, so the light can be aimed down onto a surface, sideways across a wall, or up at the ceiling — and changed again whenever the room changes. The domed form keeps the source recessed inside the shade, so from any normal standing angle you see a lit disc rather than a bulb.
Three Things You Decide
Only the canopy has to sit on your ceiling box. Where the cables go, how far they drop and which way each light points — all yours.

Hang the Cables Where You Want
Each light hangs from a small hook you fix yourself. Put them close together over an island, spread them across a room, or run one into a corner.
This is what solves a ceiling box in the wrong place. The wiring stays put — the light comes to you.
Mark each spot with tape and look at it for a day before you drill.
Set Each One to Its Own Height
The cables are long, and you choose how much to let out. Drop one low over a chair while the rest stay high, or bring them all level over a table.
Over a table, hang them 30–36″ above the top. Where people walk, leave 7 ft of clear space underneath.
The cable goes up to the hook first, then down. Allow for that when you measure.

Point Each Light Where You Need It
Every shade turns by hand. One down onto a worktop, one sideways at a wall, one up at the ceiling — and you can change them again any time. No tools.
The bowl holds the light deep inside, so you see a soft glowing circle, not a bare lamp.
One on a surface, one on a wall, one on the ceiling does more for a room than three pointing down.
Need more than five?
Larger rooms and longer tables sometimes want seven, nine or more — and because every drop is routed independently, there is no design reason to stop at five. Tell us the room, the ceiling height and where your junction box sits, and we will quote a custom head count and cable length before anything is made.
The Details
Good to Know
Cable length is the number that matters
The canopy has to sit on your junction box, but every cable after that is routed by hand to hooks you place yourself. How far each light can travel from the box is decided entirely by the cable length — not by the size of the fixture.
So before you order, measure the distance from your junction box to where you actually want each light, and remember the cable does not run in a straight line — it rises to a hook, then falls to the shade. Allow generously for that slack. If your run is longer than the standard cable, tell us before we ship and we will supply extra.
What an integrated LED means
The light source is built into the head rather than screwed into a socket. The advantage: nothing to buy, nothing to replace, and the whole face lights evenly with no lamp visible inside the dome.
Three Heads or Five
The shade is the same size in both versions — what changes is how many of them you have, and therefore how much wall and ceiling you can cover. Everything else about the shape is decided at installation, not at checkout.
Easier to plan and easier to get right the first time. If you have not routed cables before, start here.

Five heads from one junction box is the version that solves a badly placed box outright.

You Are Not Buying a Size — You Are Buying a Reach
On a cable-routed fixture there is no fixed width to quote. The canopy sits on your junction box; every cable after that is hooked wherever you place it, so the same three or five heads can sit in a tight cluster over an island or spread right across a room. The spread is chosen on the day it goes up, not at checkout.
Which makes cable length the number to check, not shade diameter. Measure from your junction box to where each light actually needs to be — and remember the cable does not run straight: it rises to a hook and then falls to the shade, so allow generously for that slack. If your run is longer than the standard cable, tell us before we ship and we will supply extra.
Two practical notes. Over a table or island, hang the shades 30–36″ (75–90 cm) above the surface and keep them level with one another; in any walkway keep 7 ft (2.1 m) of floor clearance. And before drilling, mark every hook position with tape and live with it for a day — it is the only reliable way to judge the spacing in your own room rather than in a photograph.
It Arrives Without a Shape
Cables, heads, and three decisions that are yours.
Almost every light you can buy is finished before it reaches you. The arms are where the arms are, the drop is the drop, the light points down because that is how it was assembled — and the only real question left is whether it fits. This one is not finished. It is a canopy, a set of cables and a set of heads, and it takes its form on the day it goes up.
That starts with a problem almost every home has. The junction box is rarely where the light needs to be — it is centred on a room that has since been rearranged, or off to one side of an island that was added later, and moving it means opening a ceiling and repainting. Here the box only carries the wiring. Every cable after it is hooked wherever you decide, so the light travels to the furniture instead of the furniture arranging itself under the light.
Then the second decision: how far each one falls. One low over a reading chair while the others stay high, or all of them level over a table. And then the third, which is the one nothing else on this page can do — every head turns on its own. Point one down onto a worktop, one sideways to wash a wall, one up at the ceiling. A room lit from three directions is a different room from one lit from three identical downward cones.
None of it is permanent. Move a hook, fill a small hole, turn a head — no electrician, no rewiring, nothing opened up. Which means the arrangement you settle on this year is not the one you are stuck with. Rearrange the room and the light rearranges with it.
It Goes Where the Light Is Needed
Cables you route yourself, heads that turn on their own, and a canopy that stays on the box you already have.
You Route the Cables,
Every Head Turns on Its Own
Each pendant cord can be flexibly arranged to suit your needs—whether clustered closely above a kitchen island or spread out across the room. The two versions feature identical shades; the only difference lies in the number of shades, which determines the ceiling coverage. As each cord is wired independently, there are no strict limits on quantity—please feel free to inquire about custom configurations with a different number of light points.
Three Heads or Five, Same Shade
The shade is identical in both versions — what changes is how many of them you have, and therefore how much ceiling you can cover. Three suits an island, a table or a single seating area. Five reaches across an open-plan kitchen and dining room, or down a stairwell, all from one junction box. And because every drop is routed independently, there is no design reason to stop at five — ask us about a custom count.
Aluminium Heads, Acrylic Faces
Both are structural decisions rather than substitutes for something heavier. Aluminium keeps each head light enough to hang on a cable and stay put at whatever angle you turn it to — a steel or glass head this size would sag or need a rigid arm, and the tilt would be gone. Acrylic diffuses evenly across the whole face at the shallow depth this dome allows, and it will not shatter if a head is knocked while you are routing cables.
— turned by hand, changed whenever you like —
Common Questions
Does it have to hang under the ceiling box?
No — and that is the main reason to choose it. Only the round canopy sits on the box. Every cable runs out from there to a small hook you screw into the ceiling wherever you want the light.
How far from the box can each light go?
Can I really point each light in a different direction?
Will the light shine in my eyes?
How do I fix the hooks so they are safe?
Each hook holds the weight of its light plus the sideways pull of the cable, which is more than a picture hook deals with. Screw into a ceiling joist wherever you can. Where a hook has to go between joists, use a proper heavy-duty ceiling anchor rated for the weight.
How do I plan the layout before drilling?
Three heads or five?
Can I get more than five?
Can I change the bulbs, and can it be dimmed?
The LED is built into each head — there are no bulbs to buy and none to change. That is what gives the whole face an even glow with nothing visible inside. The trade-off worth knowing: the warmth of the light is set when it is made and cannot be swapped later the way a bulb can.
This light is dimmable but requires a dimmer designed specifically for LED lights—please contact us if you need the dimmable version.
How high should I hang them?
The Complete Installation Guide
Not sure how to wire it, how high to hang it, or whether you need an electrician? Our full guide walks through every step for US homes.
Power Off First
Switch off at the breaker and confirm before you touch any wiring.
Check the Box
Make sure your junction box is standard, secure, and rated for the weight.
Match the Wires
Black to black, white to white, ground to ground — the US standard explained.
Set the Height
Mounting heights and clearances for sconces, pendants, and chandeliers.
Onda Adjustable Cable Cluster Chandelier
The price includes tax, and free standard shipping within the U.S. is provided.

The beauty of a fixture is easy to photograph. What matters just as much is what sits inside the canopy—the driver, the bracket, the wiring, the hardware in the box. Here is how we build for safety and longevity, so the fixture you order arrives ready to install and made to last.

An LED Driver Built to Last
We offer integrated LED drivers in a range of styles—dimmable, constant-current, and color-temperature-adjustable—so the fixture can be matched to how you actually light the room. It runs on 110–240V, works straight out of the box on standard US household power, and is rated for both dry and damp locations, so it fits wherever you'd like to install it.
A Solid Mounting Bracket
Every fixture ships with a sturdy mounting bracket sized to a standard US junction box—so it hangs true and stays secure, year after year. No improvising, no trips to the hardware store.
Everything You Need, in One Box
Open the carton and it's all there—canopy, mounting plate and bracket, screws and wall anchors, the driver, and a pair of clean cotton gloves for handling the glass. Nothing missing, nothing to source separately. It's the small stuff, packed with care, that makes installation day feel easy.
Clean, Color-Coded Wiring
Clearly labeled leads and a tidy factory harness make professional installation quick and unambiguous. Hand it to your electrician and they'll have it up in minutes—standard L / N / E hardwiring, the way a considered fixture should be.
Order with confidence: what arrives at your door is a fixture built to be lived with—considered on the inside, finished on the outside. Wiring should be carried out by a qualified electrician in line with local code.
Free Shipping on all orders
Hassle-free return within 30 days
Payment Security
Pairs Well With
See It In Motion
Watch the Light Come to Life
The Onda Adjustable Cable Cluster Pendant runs domed shades on long cables from a single canopy — and leaves almost every decision to you. Hook the cables where you want them, let the slack fall as long or as short as suits the room, and tilt each head individually to point light exactly where it is needed.
Most pendants arrive with their geometry settled. This one arrives as parts. The canopy takes the wiring and sits on your junction box; every cable after that is routed by hand, caught on small ceiling hooks you place yourself. Cluster them tightly over an island, spread them across a room, or let one drop long over a chair while the others stay high.
Each shade pivots at its cable joint, so the light can be aimed down onto a surface, sideways across a wall, or up at the ceiling — and changed again whenever the room changes. The domed form keeps the source recessed inside the shade, so from any normal standing angle you see a lit disc rather than a bulb.
Three Things You Decide
Only the canopy has to sit on your ceiling box. Where the cables go, how far they drop and which way each light points — all yours.
Hang the Cables Where You Want
Each light hangs from a small hook you fix yourself. Put them close together over an island, spread them across a room, or run one into a corner.
This is what solves a ceiling box in the wrong place. The wiring stays put — the light comes to you.
Mark each spot with tape and look at it for a day before you drill.
Set Each One to Its Own Height
The cables are long, and you choose how much to let out. Drop one low over a chair while the rest stay high, or bring them all level over a table.
Over a table, hang them 30–36″ above the top. Where people walk, leave 7 ft of clear space underneath.
The cable goes up to the hook first, then down. Allow for that when you measure.
Point Each Light Where You Need It
Every shade turns by hand. One down onto a worktop, one sideways at a wall, one up at the ceiling — and you can change them again any time. No tools.
The bowl holds the light deep inside, so you see a soft glowing circle, not a bare lamp.
One on a surface, one on a wall, one on the ceiling does more for a room than three pointing down.
Need more than five?
Larger rooms and longer tables sometimes want seven, nine or more — and because every drop is routed independently, there is no design reason to stop at five. Tell us the room, the ceiling height and where your junction box sits, and we will quote a custom head count and cable length before anything is made.
The Details
Good to Know
Cable length is the number that matters
The canopy has to sit on your junction box, but every cable after that is routed by hand to hooks you place yourself. How far each light can travel from the box is decided entirely by the cable length — not by the size of the fixture.
So before you order, measure the distance from your junction box to where you actually want each light, and remember the cable does not run in a straight line — it rises to a hook, then falls to the shade. Allow generously for that slack. If your run is longer than the standard cable, tell us before we ship and we will supply extra.
What an integrated LED means
The light source is built into the head rather than screwed into a socket. The advantage: nothing to buy, nothing to replace, and the whole face lights evenly with no lamp visible inside the dome.
Three Heads or Five
The shade is the same size in both versions — what changes is how many of them you have, and therefore how much wall and ceiling you can cover. Everything else about the shape is decided at installation, not at checkout.
Easier to plan and easier to get right the first time. If you have not routed cables before, start here.
Five heads from one junction box is the version that solves a badly placed box outright.
You Are Not Buying a Size — You Are Buying a Reach
On a cable-routed fixture there is no fixed width to quote. The canopy sits on your junction box; every cable after that is hooked wherever you place it, so the same three or five heads can sit in a tight cluster over an island or spread right across a room. The spread is chosen on the day it goes up, not at checkout.
Which makes cable length the number to check, not shade diameter. Measure from your junction box to where each light actually needs to be — and remember the cable does not run straight: it rises to a hook and then falls to the shade, so allow generously for that slack. If your run is longer than the standard cable, tell us before we ship and we will supply extra.
Two practical notes. Over a table or island, hang the shades 30–36″ (75–90 cm) above the surface and keep them level with one another; in any walkway keep 7 ft (2.1 m) of floor clearance. And before drilling, mark every hook position with tape and live with it for a day — it is the only reliable way to judge the spacing in your own room rather than in a photograph.
It Arrives Without a Shape
Cables, heads, and three decisions that are yours.
Almost every light you can buy is finished before it reaches you. The arms are where the arms are, the drop is the drop, the light points down because that is how it was assembled — and the only real question left is whether it fits. This one is not finished. It is a canopy, a set of cables and a set of heads, and it takes its form on the day it goes up.
That starts with a problem almost every home has. The junction box is rarely where the light needs to be — it is centred on a room that has since been rearranged, or off to one side of an island that was added later, and moving it means opening a ceiling and repainting. Here the box only carries the wiring. Every cable after it is hooked wherever you decide, so the light travels to the furniture instead of the furniture arranging itself under the light.
Then the second decision: how far each one falls. One low over a reading chair while the others stay high, or all of them level over a table. And then the third, which is the one nothing else on this page can do — every head turns on its own. Point one down onto a worktop, one sideways to wash a wall, one up at the ceiling. A room lit from three directions is a different room from one lit from three identical downward cones.
None of it is permanent. Move a hook, fill a small hole, turn a head — no electrician, no rewiring, nothing opened up. Which means the arrangement you settle on this year is not the one you are stuck with. Rearrange the room and the light rearranges with it.
It Goes Where the Light Is Needed
Cables you route yourself, heads that turn on their own, and a canopy that stays on the box you already have.
You Route the Cables,
Every Head Turns on Its Own
Each pendant cord can be flexibly arranged to suit your needs—whether clustered closely above a kitchen island or spread out across the room. The two versions feature identical shades; the only difference lies in the number of shades, which determines the ceiling coverage. As each cord is wired independently, there are no strict limits on quantity—please feel free to inquire about custom configurations with a different number of light points.
Three Heads or Five, Same Shade
The shade is identical in both versions — what changes is how many of them you have, and therefore how much ceiling you can cover. Three suits an island, a table or a single seating area. Five reaches across an open-plan kitchen and dining room, or down a stairwell, all from one junction box. And because every drop is routed independently, there is no design reason to stop at five — ask us about a custom count.
Aluminium Heads, Acrylic Faces
Both are structural decisions rather than substitutes for something heavier. Aluminium keeps each head light enough to hang on a cable and stay put at whatever angle you turn it to — a steel or glass head this size would sag or need a rigid arm, and the tilt would be gone. Acrylic diffuses evenly across the whole face at the shallow depth this dome allows, and it will not shatter if a head is knocked while you are routing cables.
— turned by hand, changed whenever you like —
Common Questions
Does it have to hang under the ceiling box?
No — and that is the main reason to choose it. Only the round canopy sits on the box. Every cable runs out from there to a small hook you screw into the ceiling wherever you want the light.
How far from the box can each light go?
Can I really point each light in a different direction?
Will the light shine in my eyes?
How do I fix the hooks so they are safe?
Each hook holds the weight of its light plus the sideways pull of the cable, which is more than a picture hook deals with. Screw into a ceiling joist wherever you can. Where a hook has to go between joists, use a proper heavy-duty ceiling anchor rated for the weight.
How do I plan the layout before drilling?
Three heads or five?
Can I get more than five?
Can I change the bulbs, and can it be dimmed?
The LED is built into each head — there are no bulbs to buy and none to change. That is what gives the whole face an even glow with nothing visible inside. The trade-off worth knowing: the warmth of the light is set when it is made and cannot be swapped later the way a bulb can.
This light is dimmable but requires a dimmer designed specifically for LED lights—please contact us if you need the dimmable version.
How high should I hang them?
The Complete Installation Guide
Not sure how to wire it, how high to hang it, or whether you need an electrician? Our full guide walks through every step for US homes.
Power Off First
Switch off at the breaker and confirm before you touch any wiring.
Check the Box
Make sure your junction box is standard, secure, and rated for the weight.
Match the Wires
Black to black, white to white, ground to ground — the US standard explained.
Set the Height
Mounting heights and clearances for sconces, pendants, and chandeliers.